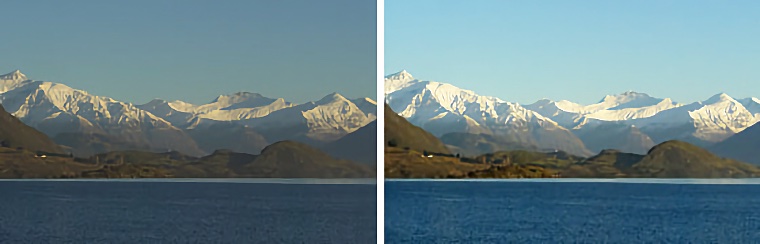
 Photography Tips: Contrast and Brightness A common problem with photos, especially digital photos, is that the overall balance of light and dark areas isn't right. There might be too much shadow, or the white areas might look grey, or the overall look of the photo might be too grey. A simple approach to fixing this is to adjust the brightness and contrast of the image on a computer using a program such as Photoshop. Using simple tools like contrast and brightness can be effective but they often create new problems. For example correcting greyish dark areas by making the whole image darker will often make areas that should be bright too dark. Often a more sophisticated approach is required. Notice in the images at the top of this page how the snow and sky is more intense on the right but the water and hills remain the same. There are two tools in Photoshop which can help: Levels and Curves. Levels Levels displays a histogram (a graph showing the amount of the image which has different levels of light) of the overall image brightness. This can be used two ways: first by just looking at the graph the problems with light distribution in the image can be seen, and second points on the curve can be changed to improve the image. Dragging the slider on the right makes the bright areas of the image brighter by moving the white point down. Dragging the slider on the left makes the dark areas in the image darker by moving the black point up. Changing the slider in the center adjusts the grey point making the greys darker or brighter. The key point is this is non-linear - not all parts are changed by the same amount so the problems with simpler approaches are avoided. 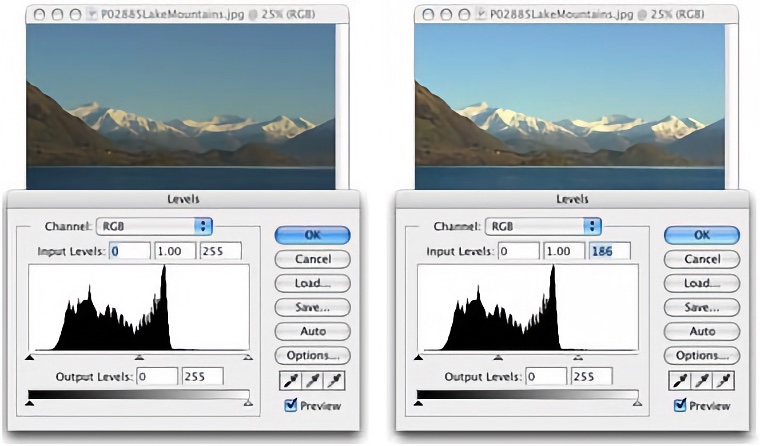 On the left above you can see the original image which has very little in the bright part of the graph (the right side). By dragging the slider left the brightness is redistributed giving a more balanced look. Notice the second graph is more even between the black slider and the new position of the white slider. Note that the images above were done with an old version of Photoshop, but new software works in a very similar way. Curves Curves displays a graph of the old image brightness against the new image brightness. When the graph line is straight from bottom-left to top-right nothing has changed. By moving the line up everything gets brighter. By moving it down everything gets darker. Moving parts of the line affects that part only. For example, by moving the top part up whites get brighter but everything else stays the same. This is a very powerful technique once you get used to it, and I use it to enhance many of my digital images. 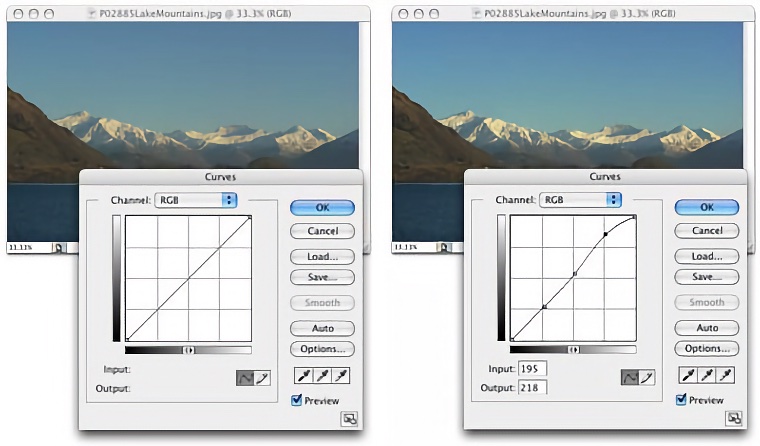 On the left above you can see the original image with the line on the graph running straight through the diagonal indicating no correction is being applied. By adjusting the curve at the top end (bright areas) I have brightened the snow and sky without affecting the darker areas (notice that the bottom part of the graph is still straight). Note that the images above were done with an old version of Photoshop, but new software works in a very similar way.
| ||||||||||||||||||||||||||||||||||