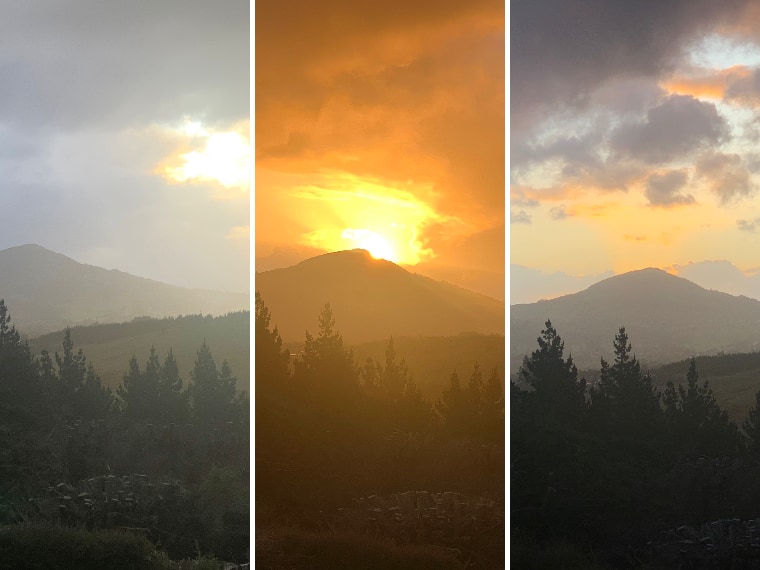
 Photography Tips: Lighting The process of photography is often referred to as "capturing the light", and when you think about it, that's all you're doing: letting light contact a sensor (either old school film or a modern digital sensor) briefly and storing the resulting image. So it shouldn't be surprising that very different images can be created by changing the way the light is captured or by waiting for just the right time when the light is the right intensity, or at the right angle, or the shadows are at the right orientation. The three photos at the top of this page are all of the same sunset taken on the same day. In the first one the sun is still in the sky although its intensity is reduced by some cloud. In the second the sun is just setting behind the hill, and again is reduced in intensity a bit by cloud. In the final, the sun is completely behind the hill with some light leaking upwards through a gap in the clouds. Notice that the strongest colours - and the most striking image - are available just as the sun is setting. Just a few minutes is enough at this time of day to make a big difference to the final image. Colours are often enhanced in lower light, but only to a certain extent, because as the light diminishes more, the colour intensity tends to drop off again. You may not want the strongest colour available (I find the middle image here a bit too much) and it can be hard to tell which lighting conditions will give the best results, so try a few at different times. One of the great things about digital photography is you can take as many images as you want for free! Also, be aware that in situations where there is massive difference between the brightest and dimmest areas of the scene that where you point the camera can make a big difference. If the camera exposes on the bright area you will get a completely different image than if you expose on the darker areas, so use spot metering, or exposure compensation, or even full manual (see my tip on these topics) to get the result you want. Use the panel on the digital camera, the screen on your smart phone, or the digital viewfinder on mirrorless cameras to preview the image, but be aware it's only once you get it onto your computer that you can fully verify you got the image you wanted. Don't be scared to enhance the image after taking it either. If your camera supports raw photo storage it can be possible to pull a lot of extra detail out of underexposed or overexposed areas this way. Refer to my tip on contrast and brightness adjustment for some ideas on this.
| ||||||||||||||||||||||||||||||||||